
Freemium
Checkout Field Editor for WooCommerce
815
Reviews
400,000
Installs
Daily 144 new websites choose to install this plugin.

TL;DR
Add 24 different types of custom checkout fields to your Checkout page.Screenshots


Details
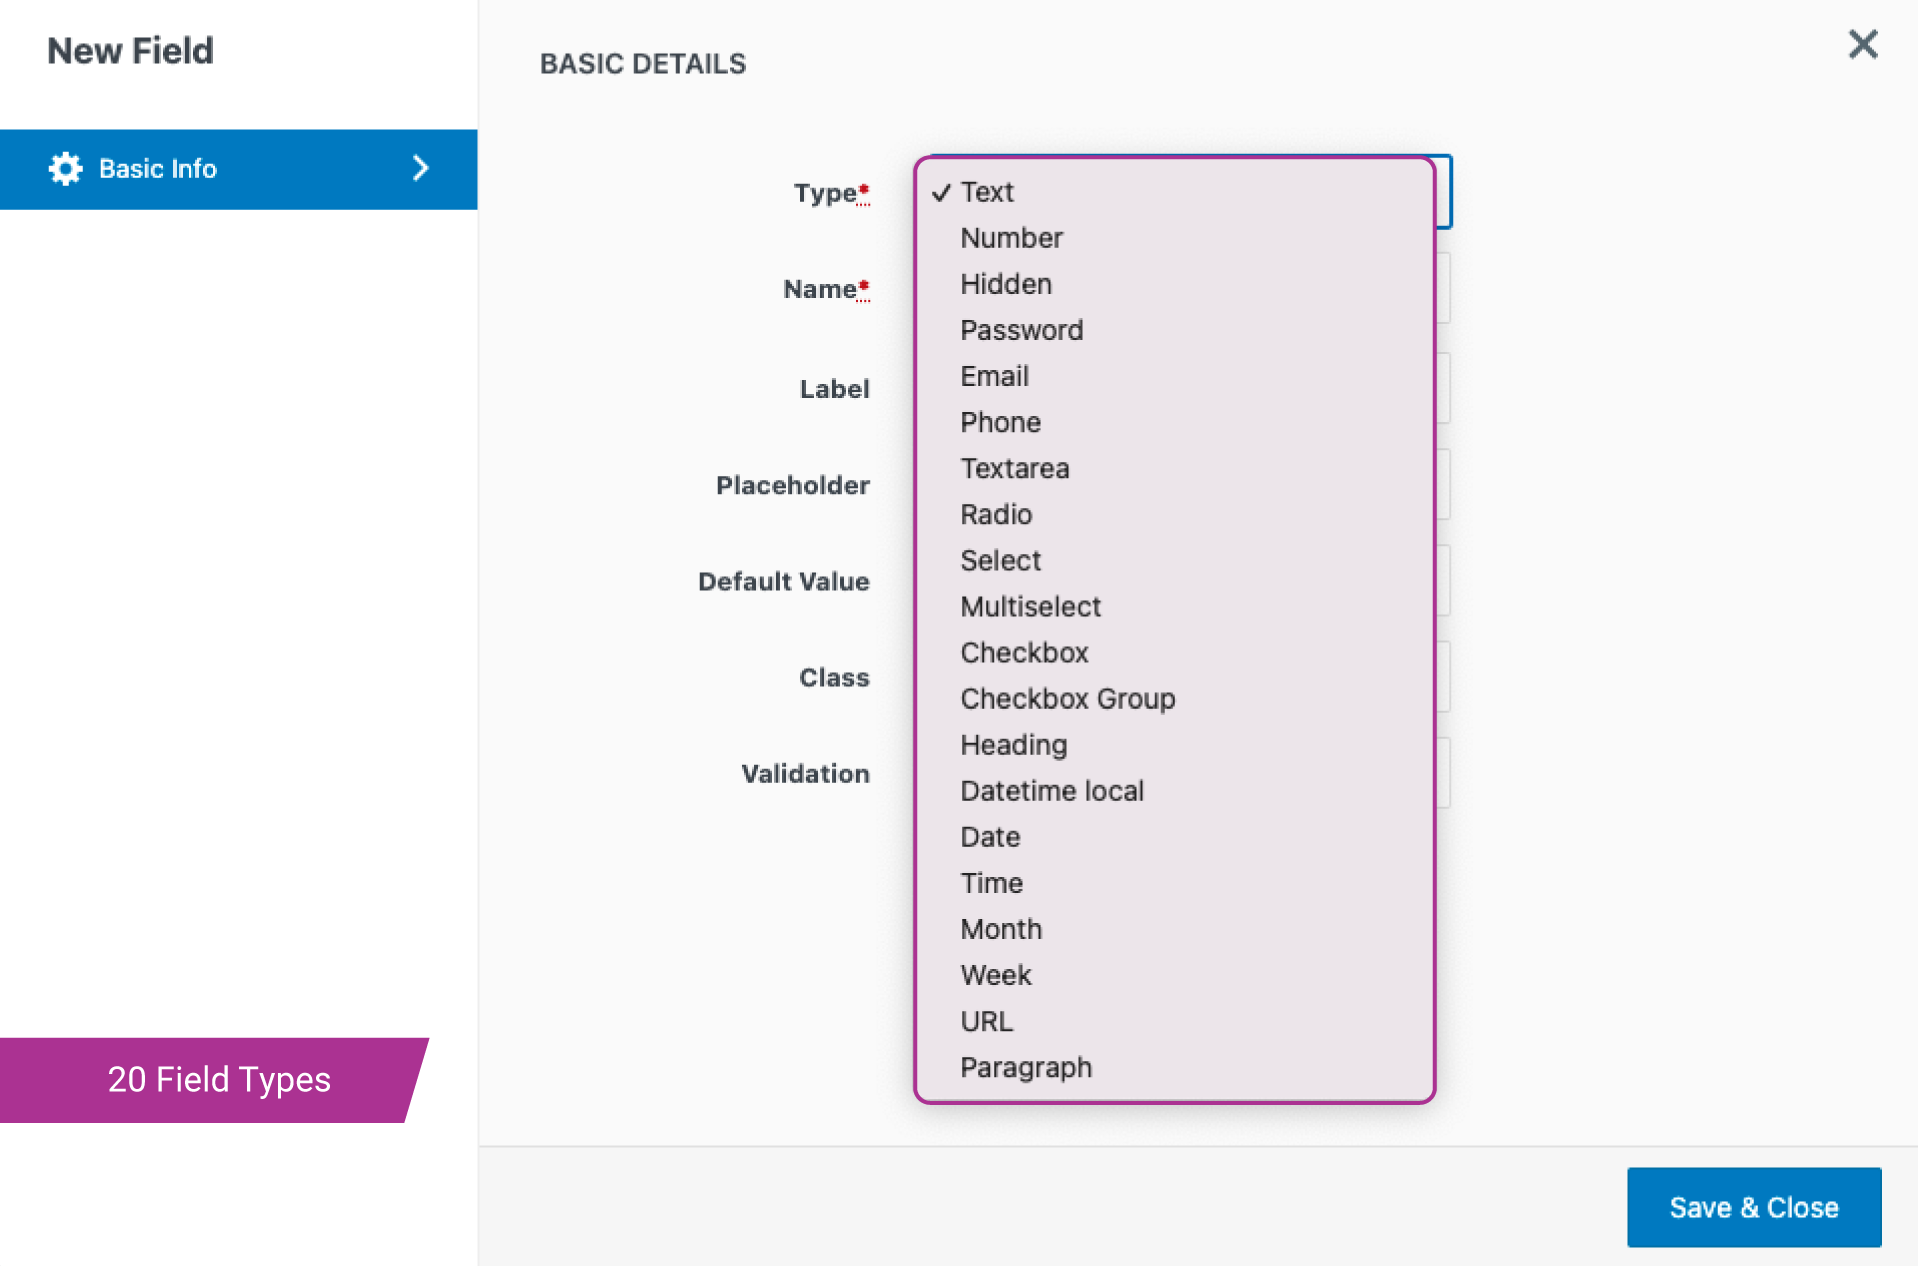
24 Custom Checkout Field Types
- Text
- Hidden
- Password
- Telephone
- Number
- Textarea
- Select
- Multi-Select
- Radio
- Checkbox
- Checkbox Group
- File Upload
- Date Picker
- Time Picker
- Datetime local
- Date
- Month
- Time
- Week
- URL
- Heading
- Label
- Paragraph
Display custom fields at 14 different positions
The Premium version allows you to show them in 14 different places.
- Before customer details
- After customer details
- Before billing form
- After billing form
- Before shipping form
- After shipping form
- Before registration form
- After registration form
- Before order notes
- After order notes
- Before terms and conditions
- After terms and conditions
- Before submit button
- After submit button
- Inside a custom step created using WooCommerce MultiStep Checkout
Field Conditionals
The various custom fields can be displayed only if a set of conditions are met. Following are the conditions with which the fields can be displayed conditionally:
- Cart Contents
- Cart Subtotal
- Cart Total
- User Roles
- Product
- Product Variation
- Product Category
- Based on other field values
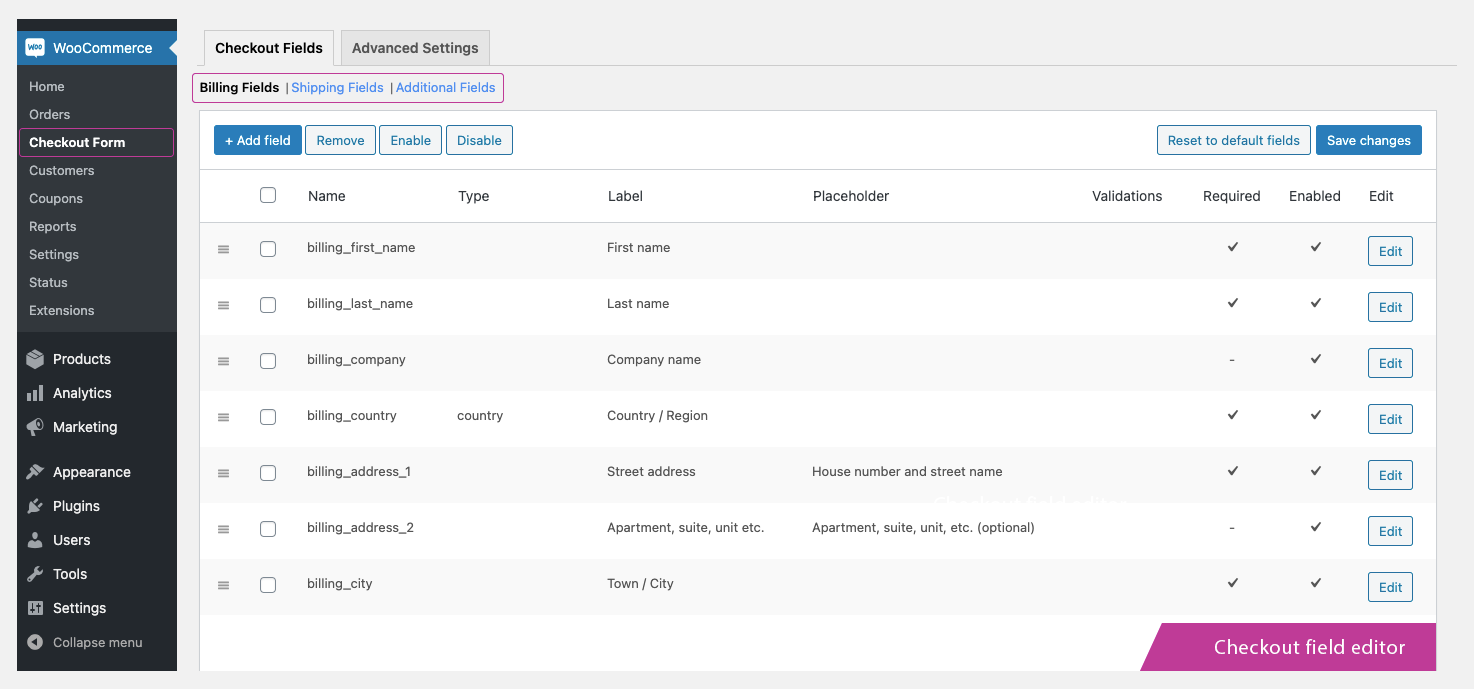
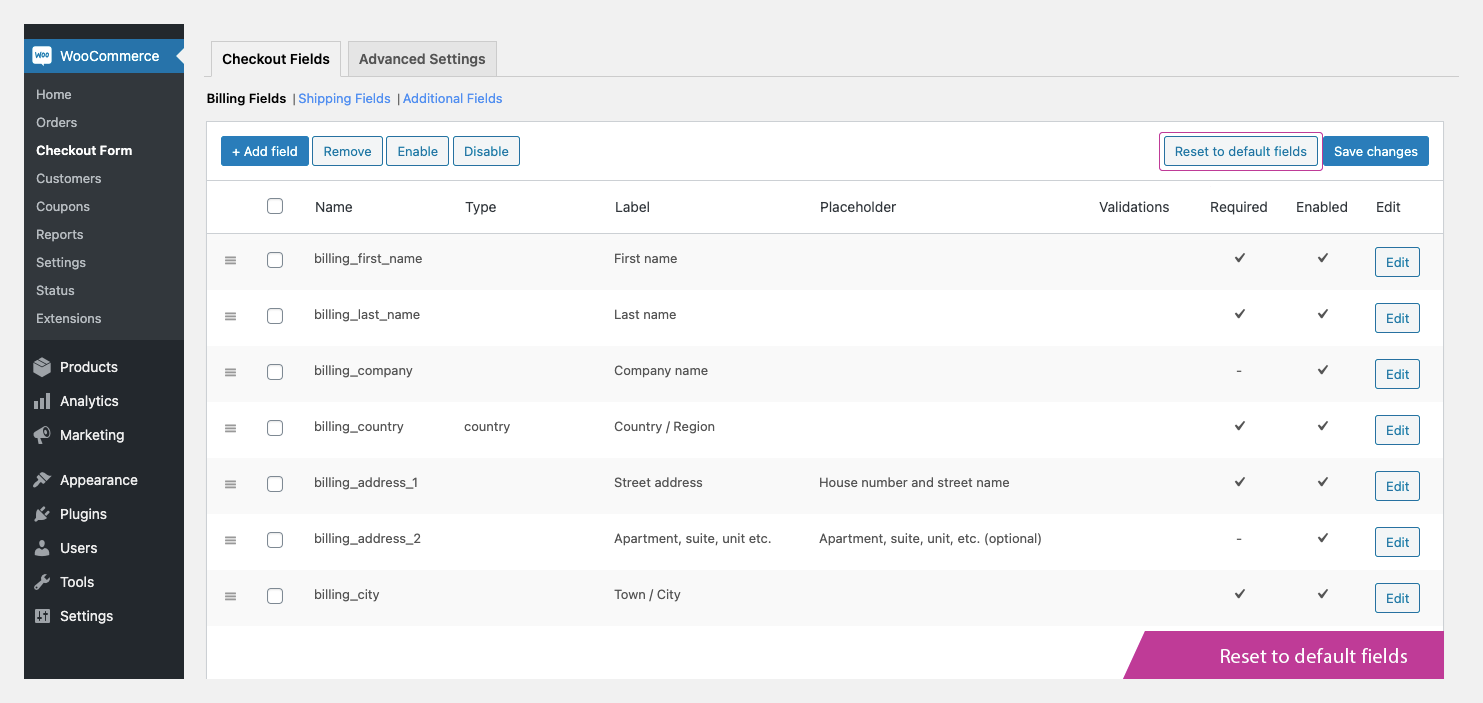
How to Add/Edit Custom Fields in WooCommerce Checkout Page?
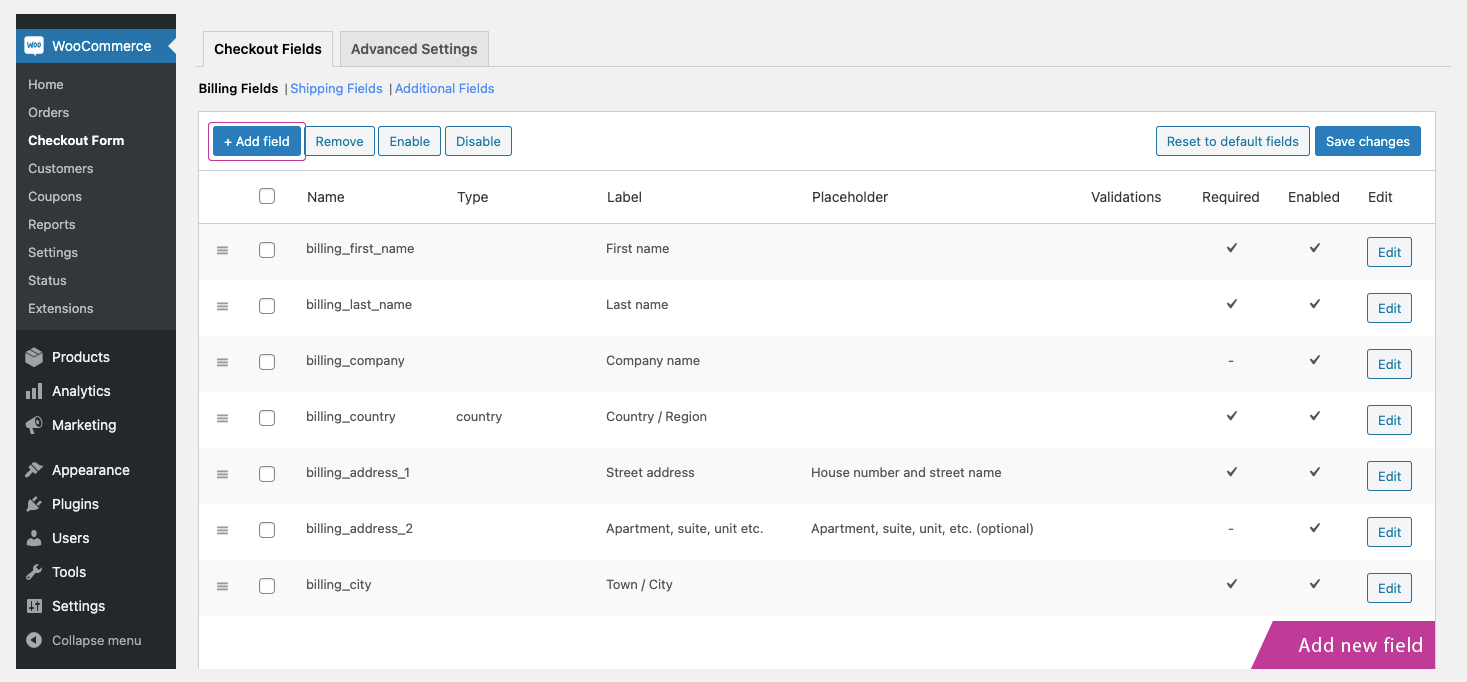
- Go to Dashboard > WooCommerce > Checkout Form > Checkout Fields page.
- Click on the Add field button.
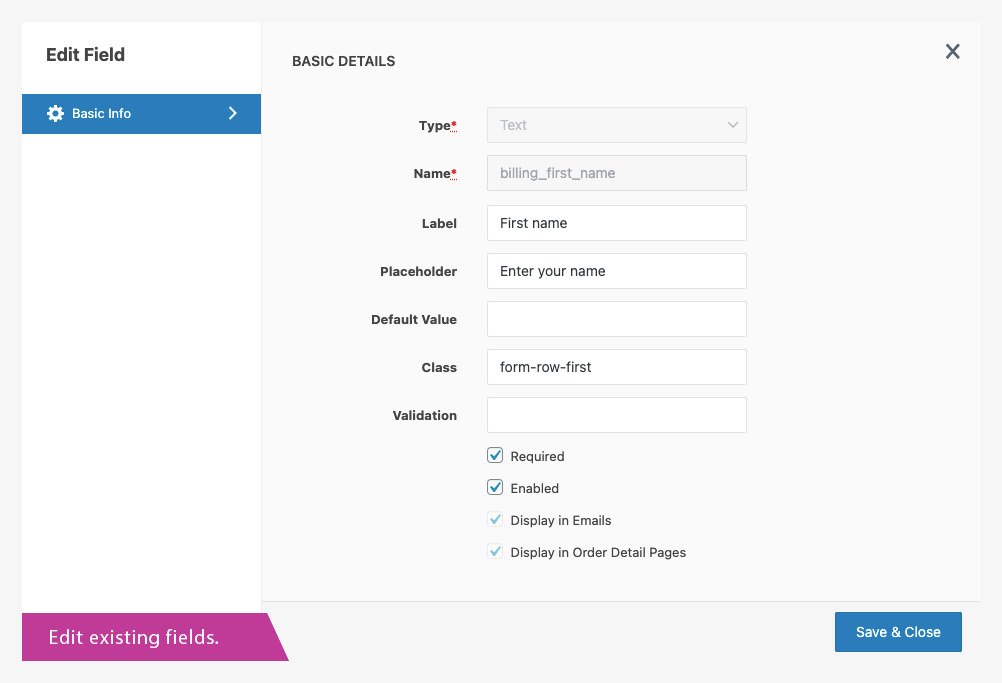
- Enter a Name, Field Type, Label, and other details of your field.
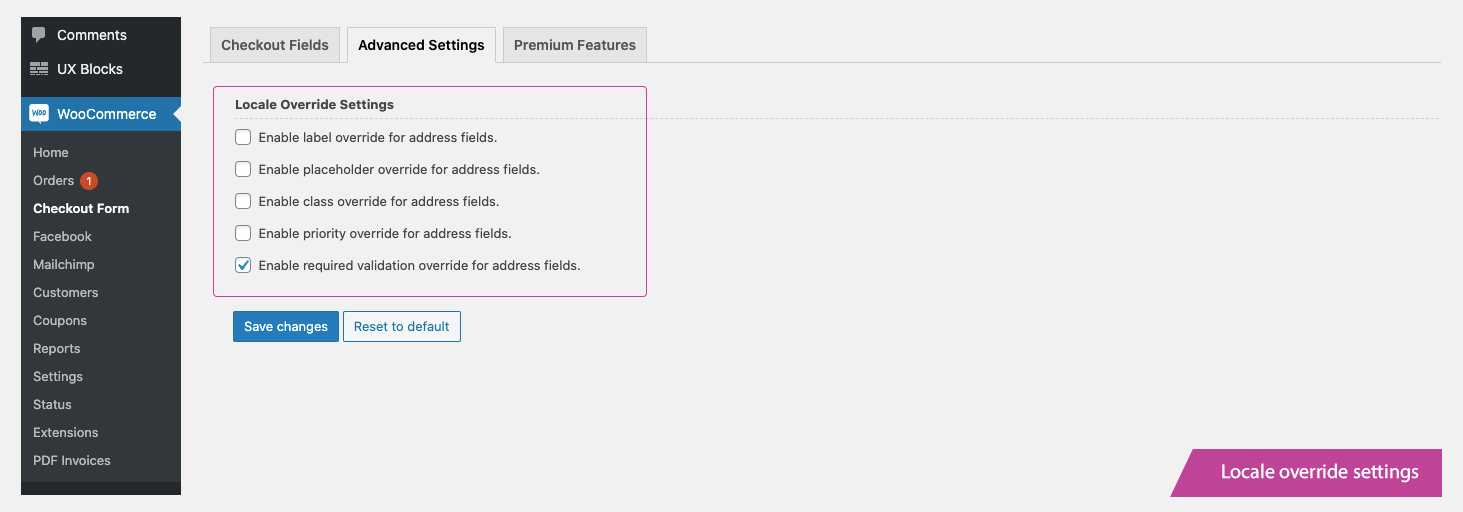
- Display Rules – Set display rules from the Display Rules tab if required.
- Display Styles – Set display styles from the Display styles tab if required.
- Price details – Set price details from the Price details tab if required.
- Repeat Rules – Set repeat rules from the Repeat Rules tab if required.
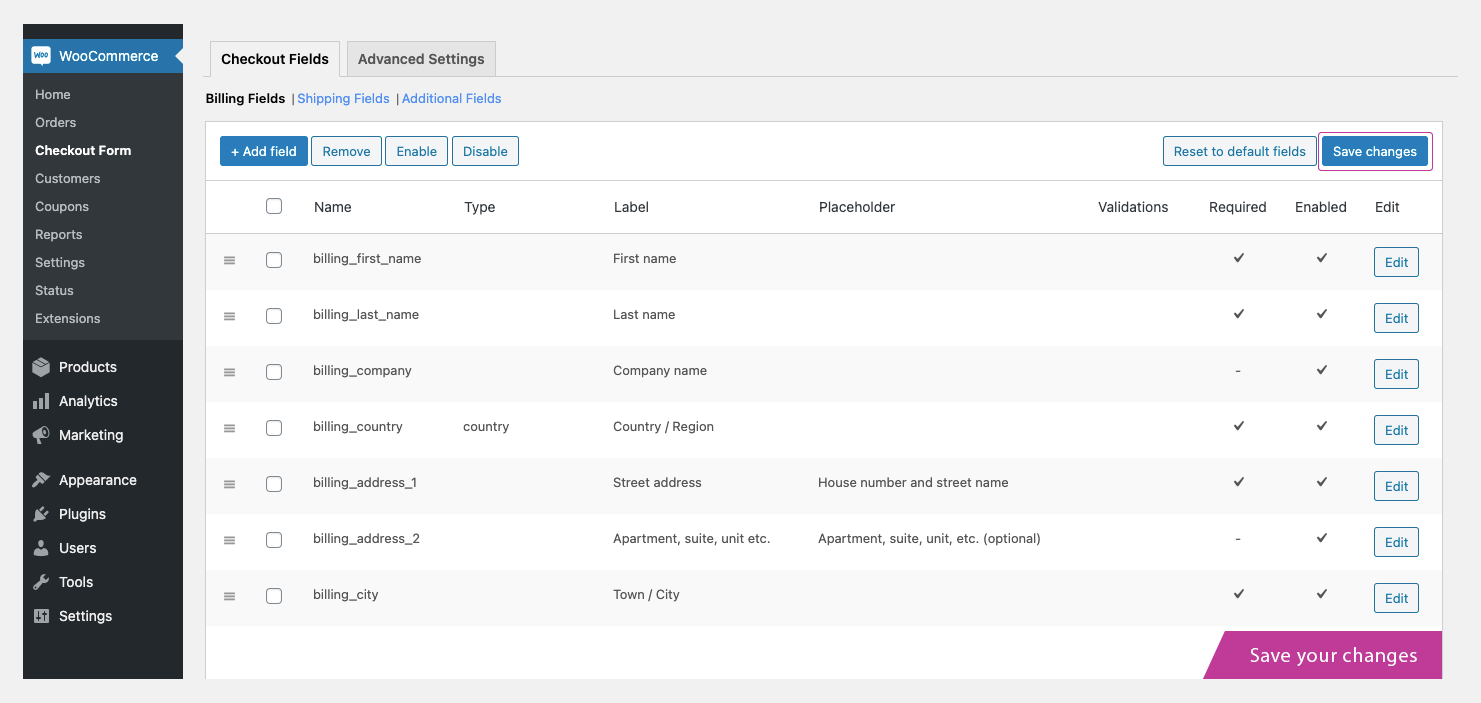
- Click on the Save Field button.